
【Unity3D插件】Photon Unity Networking(PUN)使用教程
一、前言
Photon Unity Networking (PUN)是一种用于多人游戏的Unity软件包。灵活的匹配可以让玩家进入房间,可以通过网络同步对象。快速和可靠的通信是通过专用的Photon 服务器完成的,因此客户端连接不需要1对1。
二、参考文章
1、【PUN】Photon Unity Networking(PUN)的简单使用2、【Unity3D】 Photon多人游戏开发教程3、PUN介绍(干货)4、Photon Unity Networking 案例(一)5、Unity3D利用Photon实现实时联网对战(二)PUN SDK介绍6、Photon Unity Networking基础教程 7 修改Player的联网版本7、使用Photon Unity Networking开发多人网络游戏的基本思路(一):大厅与等待房间
三、正文快速搭建
1.下载PUN插件,下载地址:https://doc.photonengine.com/en-us/pun/current/getting-started/pun-intro 会跳转到AssetStore商店:
 需要注意的是版本要Unity2017.4.7以上,如果是以前的版本,可以安装PUN1.0版本
或者直接在Unity里面Alt+9访问商店,然后搜索PUN插件
2.然后需要打开Photon的官网注册一个账号,https://dashboard.photonengine.com/Account/SignIn?ReturnUrl=%2fzh-CN%2fpubliccloud 登录以后,点击新建一个APP:
 类型的话,如果是聊天室可以选择Photon Chat,普通的选择Photon PUN就可以了
 复制App ID,到Unity项目中的Photon/PhotonUnityNetworking/Resources/PhotonServerSettings的App Id Realtim
 3.新建场景,新建一个Plane,和Cube,将Cube设成预制体,放到Resouces文件夹:
 4.给Cube加上Photon View组件,如果要同步的话,这个组件是必须的
 将Cube的Transform拖入Observed Components5.新建脚本ClickFloor,将脚本付给Plane
using Photon.Pun;using UnityEngine;public class ClickFloor : MonoBehaviour{ public GameObject m_Prefab; void Update() { if (Input.GetMouseButtonDown(0)) { Ray ray = Camera.main.ScreenPointToRay(Input.mousePosition); RaycastHit hit; if (Physics.Raycast(ray, out hit)) { PhotonNetwork.Instantiate(m_Prefab.name, hit.point + new Vector3(0, 3, 0), Quaternion.identity, 0); } } }}

 6.新建脚本PhotonConnect.cs
using UnityEngine;using Photon.Pun;//导入Photon命名空间using Photon.Realtime;public class PhotonConnect : MonoBehaviour{ void Start() { //初始化版本号 PhotonNetwork.ConnectUsingSettings(); PhotonNetwork.GameVersion = “1”; } //按钮事件 创建房间 public void Btn_CreateRoom(string _roomName) { //设置房间属性 RoomOptions m_Room = new RoomOptions { IsOpen = true, IsVisible = true, MaxPlayers = 4 }; PhotonNetwork.CreateRoom(_roomName, m_Room); } //根据房间名加入房间 public void Btn_JoinRoom(string _roomName) { PhotonNetwork.JoinRoom(_roomName); } //随机加入已经创建的房间 public void Btn_JoinRandomRoom() { PhotonNetwork.JoinRandomRoom(); } void OnGUI() { //显示连接信息 GUILayout.Label(PhotonNetwork.NetworkClientState.ToString(),GUILayout.Width(300),GUILayout.Height(100)); }}
7.将脚本付给Main Camera(任意一个场景中的对象就行),然后新建3个按钮,绑定事件:

 8.Cube预制体Apply一下,然后从场景中删除,运行:
API解析连接和回调
ConnectUsingSettings 建立连接
PhotonNetwork.ConnectUsingSettings();
PUN 使用回调让你知道客户什么时候建立了连接,加入了一个房间等等。
例如:IConnectionCallbacks.OnConnectedToMaster.
为了方便起见,可以继承MonoBehaviourPunCallbacks接口,它实现了重要的回调接口并自动注册自己,只需覆盖特定的回调方法
public class YourClass : MonoBehaviourPunCallbacks{ public override void OnConnectedToMaster() { Debug.Log(“Launcher: 连接到主客户端”); }}加入和创建房间
加入房间
PhotonNetwork.JoinRoom(“someRoom”);
加入存在的随机房间
PhotonNetwork.JoinRandomRoom();
创建房间
PhotonNetwork.CreateRoom(“MyMatch”);
如果想跟朋友一起玩,可以编一个房间名称,并使用JoinOrCreateRoom创建房间,将IsVisible 设为false,那么就只能使用房间名来加入(而不是随机加入创建的房间了)
RoomOptions roomOptions = new RoomOptions();roomOptions.IsVisible = false;roomOptions.MaxPlayers = 4;PhotonNetwork.JoinOrCreateRoom(nameEveryFriendKnows, roomOptions, TypedLobby.Default);游戏逻辑
可以使用PhotonView组件将游戏对象实例化为“联网游戏对象”,它标识对象和所有者(或控制器)更新状态给其他人
需要添加一个PhotonView组件选择Observed组件并使用PhotonNetwork.Instantiate若要创建实例,请执行以下操作。
PhotonStream 负责写入(和读取)网络对象的状态,每秒钟几次,脚本需要继承接口IPunObservable,它定义了OnPhotonSerializeView。看起来是这样的:
public void OnPhotonSerializeView(PhotonStream stream, PhotonMessageInfo info){ if (stream.IsWriting) { Vector3 pos = transform.localPosition; stream.Serialize(ref pos); } else { Vector3 pos = Vector3.zero; stream.Serialize(ref pos); }}远程过程调用
Remote Procedure Calls (RPC)使你可以调用”networked GameObjects”上的方法,对由用户输入等触发的不常用动作很有用。
一个RPC会被在同房间里的每个玩家在相同的游戏对象上被执行,所以你可以容易地触发整个场景效果就像你可以修改某些GameObject。
作为RPC被调用的方法必须在一个带PhotonView组件的游戏对象上。该方法自身必须要被[PunRPC]属性标记。
[PunRPC] void ChatMessage(string a, string b) { Debug.Log(“ChatMessage ” + a + ” ” + b); }
要调用该方法,先访问到目标对象的PhotonView组件。而不是直接调用目标方法,调用PhotonView.RPC()并提供想要调用的方法名称:
PhotonView photonView = PhotonView.Get(this); photonView.RPC(“ChatMessage”, PhotonTargets.All, “jup”, “and jup!”);回调函数接口解释IConnectionCallbacks与连接相关的回调。IInRoomCallbacks房间内发生的回调ILobbyCallbacks与游戏大厅有关的回调。IMatchmakingCallbacks与配对有关的回调IOnEventCallback对接收到的事件进行一次回拨。这相当于C#事件OnEventReceived.IWebRpcCallback一个用于接收WebRPC操作响应的回调。IPunInstantiateMagicCallback实例化双关预制板的单个回调。IPunObservablePhotonView序列化回调。IPunOwnershipCallbacks双关所有权转让回调。
更多API参考:https://doc-api.photonengine.com/en/pun/v2/namespace_photon_1_1_pun.html
四、案例1.简单的多人游戏
1.新建Launcher.cs脚本
using UnityEngine;using Photon.Pun;namespace Com.MyCompany.MyGame{ public class Launcher : MonoBehaviour { #region Private Serializable Fields #endregion #region Private Fields /// /// This client’s version number. Users are separated from each other by gameVersion (which allows you to make breaking changes). /// string gameVersion = “1”; #endregion #region MonoBehaviour CallBacks /// /// MonoBehaviour method called on GameObject by Unity during early initialization phase. /// void Awake() { // #Critical // this makes sure we can use PhotonNetwork.LoadLevel() on the master client and all clients in the same room sync their level automatically PhotonNetwork.AutomaticallySyncScene = true; } /// /// MonoBehaviour method called on GameObject by Unity during initialization phase. /// void Start() { Connect(); } #endregion #region Public Methods /// /// Start the connection process. /// – If already connected, we attempt joining a random room /// – if not yet connected, Connect this application instance to Photon Cloud Network /// public void Connect() { // we check if we are connected or not, we join if we are , else we initiate the connection to the server. if (PhotonNetwork.IsConnected) { // #Critical we need at this point to attempt joining a Random Room. If it fails, we’ll get notified in OnJoinRandomFailed() and we’ll create one. PhotonNetwork.JoinRandomRoom(); } else { // #Critical, we must first and foremost connect to Photon Online Server. PhotonNetwork.ConnectUsingSettings(); PhotonNetwork.GameVersion = gameVersion; } } #endregion }}
打开PhotonServerSettings: 2.扩展MonoBehaviourPunCallback修改MonoBehaviour为MonoBehaviourPunCallbacks加using Photon.Realtime;命名空间添加以下两个方法:
public class Launcher : MonoBehaviourPunCallbacks{#region MonoBehaviourPunCallbacks Callbackspublic override void OnConnectedToMaster(){ Debug.Log(“PUN Basics Tutorial/Launcher: OnConnectedToMaster() was called by PUN”); PhotonNetwork.JoinRandomRoom();}public override void OnDisconnected(DisconnectCause cause){ Debug.LogWarningFormat(“PUN Basics Tutorial/Launcher: OnDisconnected() was called by PUN with reason {0}”, cause);}#endregion
当我们有效地加入一个房间时,它将通知您的脚本:
public override void OnJoinRandomFailed(short returnCode, string message){ Debug.Log(“PUN Basics Tutorial/Launcher:OnJoinRandomFailed() was called by PUN. No random room available, so we create one.\nCalling: PhotonNetwork.CreateRoom”); // #Critical: we failed to join a random room, maybe none exists or they are all full. No worries, we create a new room. PhotonNetwork.CreateRoom(null, new RoomOptions());}public override void OnJoinedRoom(){ Debug.Log(“PUN Basics Tutorial/Launcher: OnJoinedRoom() called by PUN. Now this client is in a room.”);}
新建字段:
/// /// The maximum number of players per room. When a room is full, it can’t be joined by new players, and so new room will be created./// [Tooltip(“The maximum number of players per room. When a room is full, it can’t be joined by new players, and so new room will be created”)][SerializeField]private byte maxPlayersPerRoom = 4;
然后修改PhototonNetwork.CreateRoom()调用并使用这个新字段
// #Critical: we failed to join a random room, maybe none exists or they are all full. No worries, we create a new room.PhotonNetwork.CreateRoom(null, new RoomOptions { MaxPlayers = maxPlayersPerRoom });
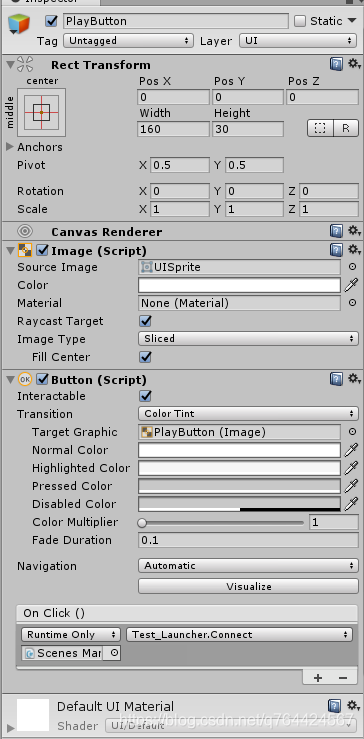
 3.UI界面搭建开始按钮新建一个Button,命名为Play Button,绑定事件Launcher.Connect()打卡脚本Launcher.cs,移除Start()函数
 4.玩家名字创建PlayerNameInputField.cs脚本:
using UnityEngine;using UnityEngine.UI;using Photon.Pun;using Photon.Realtime;using System.Collections;namespace Com.MyCompany.MyGame{ /// /// Player name input field. Let the user input his name, will appear above the player in the game. /// [RequireComponent(typeof(InputField))] public class PlayerNameInputField : MonoBehaviour { #region Private Constants // Store the PlayerPref Key to avoid typos const string playerNamePrefKey = “PlayerName”; #endregion #region MonoBehaviour CallBacks /// /// MonoBehaviour method called on GameObject by Unity during initialization phase. /// void Start () { string defaultName = string.Empty; InputField _inputField = this.GetComponent(); if (_inputField!=null) { if (PlayerPrefs.HasKey(playerNamePrefKey)) { defaultName = PlayerPrefs.GetString(playerNamePrefKey); _inputField.text = defaultName; } } PhotonNetwork.NickName = defaultName; } #endregion #region Public Methods /// /// Sets the name of the player, and save it in the PlayerPrefs for future sessions. /// /// The name of the Player public void SetPlayerName(string value) { // #Important if (string.IsNullOrEmpty(value)) { Debug.LogError(“Player Name is null or empty”); return; } PhotonNetwork.NickName = value; PlayerPrefs.SetString(playerNamePrefKey,value); } #endregion }}
5.为玩家的名字创建UI在场景中新建UI—InputField,添加事件On Value Change (String),拖动PlayerNameInputField附加到对象上,选择SetPlayerName方法 6.连接信息显示使用“GameObject/UI/Panel”菜单创建UI面板,命名为Control Panel,拖放Play Button和Name InputField在Control Panel新建一个text用作信息显示,命名为Progress Label
 7.打开Launcher.cs脚本添加以下两个属性
[Tooltip(“The Ui Panel to let the user enter name, connect and play”)][SerializeField]private GameObject controlPanel;[Tooltip(“The UI Label to inform the user that the connection is in progress”)][SerializeField]private GameObject progressLabel;
添加到Start()方法:
progressLabel.SetActive(false);controlPanel.SetActive(true);
添加到Connect()方法:
progressLabel.SetActive(true);controlPanel.SetActive(false);
添加到OnDisconnected()方法:
progressLabel.SetActive(false);controlPanel.SetActive(true);
7.创建不同的场景创建一个新场景,保存它并命名Room for 1新建一个Plane,缩放到20,1,20新建4个Cube:Cube1 Cube2
Cube2 Cube3
Cube3 Cube4
Cube4 8.新建c#脚本GameManager.cs
using System;using System.Collections;using UnityEngine;using UnityEngine.SceneManagement;using Photon.Pun;using Photon.Realtime;namespace Com.MyCompany.MyGame{ public class GameManager : MonoBehaviourPunCallbacks { #region Photon Callbacks /// /// Called when the local player left the room. We need to load the launcher scene. /// public override void OnLeftRoom() { SceneManager.LoadScene(0); } #endregion #region Public Methods public void LeaveRoom() { PhotonNetwork.LeaveRoom(); } #endregion }}
9.退出房间按钮新建一个面板Top Panel,设置锚点 添加一个退出按钮,命名为Leave Button,绑定事件Game Manager的LeaveRoom()
 10.创造其他场景2人场景:Cube1:
 Cube2:
 Cube3:
 Cube4:
 3人场景:Cube1:
 Cube2:
 Cube3:
 Cube4:
 4人场景:Floor 比例尺:60,1,60Cube1:
 Cube2:
 Cube3:
 Cube4:
 11.生成设置场景列表File/Build Settings拖放所有场景
 12.加载场景打开GameManager.cs添加新方法:
#region Private Methodsvoid LoadArena(){ if (!PhotonNetwork.IsMasterClient) { Debug.LogError(“PhotonNetwork : Trying to Load a level but we are not the master Client”); } Debug.LogFormat(“PhotonNetwork : Loading Level : {0}”, PhotonNetwork.CurrentRoom.PlayerCount); PhotonNetwork.LoadLevel(“Room for ” + PhotonNetwork.CurrentRoom.PlayerCount);}#endregion
13.检测其他玩家的加入:
#region Photon Callbackspublic override void OnPlayerEnteredRoom(Player other){ Debug.LogFormat(“OnPlayerEnteredRoom() {0}”, other.NickName); // not seen if you’re the player connecting if (PhotonNetwork.IsMasterClient) { Debug.LogFormat(“OnPlayerEnteredRoom IsMasterClient {0}”, PhotonNetwork.IsMasterClient); // called before OnPlayerLeftRoom LoadArena(); }}public override void OnPlayerLeftRoom(Player other){ Debug.LogFormat(“OnPlayerLeftRoom() {0}”, other.NickName); // seen when other disconnects if (PhotonNetwork.IsMasterClient) { Debug.LogFormat(“OnPlayerLeftRoom IsMasterClient {0}”, PhotonNetwork.IsMasterClient); // called before OnPlayerLeftRoom LoadArena(); }}#endregion
14.加入游戏大厅将下列内容附加到OnJoinedRoom()方法
// #Critical: We only load if we are the first player, else we rely on `PhotonNetwork.AutomaticallySyncScene` to sync our instance scene.if (PhotonNetwork.CurrentRoom.PlayerCount == 1){ Debug.Log(“We load the ‘Room for 1’ “); // #Critical // Load the Room Level. PhotonNetwork.LoadLevel(“Room for 1”);}
打开场景Launcher运行它。点击“Play”但如果你离开房间,你会注意到当你回到大厅时,它会自动重新加入要解决这个问题,我们可以修改Launcher.cs脚本
添加新属性:
/// /// Keep track of the current process. Since connection is asynchronous and is based on several callbacks from Photon,/// we need to keep track of this to properly adjust the behavior when we receive call back by Photon./// Typically this is used for the OnConnectedToMaster() callback./// bool isConnecting;
Connect()方法添加:
// keep track of the will to join a room, because when we come back from the game we will get a callback that we are connected, so we need to know what to do thenisConnecting = PhotonNetwork.ConnectUsingSettings();
结果:
public void Connect(){ progressLabel.SetActive(true); controlPanel.SetActive(false); if (PhotonNetwork.IsConnected) { PhotonNetwork.JoinRandomRoom(); } else { isConnecting = PhotonNetwork.ConnectUsingSettings(); PhotonNetwork.GameVersion = gameVersion; }}
OnConnectedToMaster()方法加入:
// we don’t want to do anything if we are not attempting to join a room.// this case where isConnecting is false is typically when you lost or quit the game, when this level is loaded, OnConnectedToMaster will be called, in that case// we don’t want to do anything.if (isConnecting){ // #Critical: The first we try to do is to join a potential existing room. If there is, good, else, we’ll be called back with OnJoinRandomFailed() PhotonNetwork.JoinRandomRoom(); isConnecting = false;}
15.玩家设置模型在Assets\Photon\PhotonUnityNetworking\Demos\Shared Assets\ModelsKyle Robot.fbx新建一个空场景,拖入Kyle Robot.fbx进入场景,将模型拖入Resources文件夹,做成一个预制体:
双击My Kyle Robot修改碰撞器: 动画设置
动画设置 配这个Kyle Robot我们的控制器预制件,只需设置属性Controller要指向的动画组件的Kyle Robot
 使用控制器参数新建PlayerAnimatorManager.cs脚本:
using UnityEngine;using System.Collections;namespace Com.MyCompany.MyGame{ public class PlayerAnimatorManager : MonoBehaviour { #region MonoBehaviour Callbacks // Use this for initialization void Start() { } // Update is called once per frame void Update() { } #endregion }}
创建变量:
private Animator animator;// Use this for initializationvoid Start(){ animator = GetComponent(); if (!animator) { Debug.LogError(“PlayerAnimatorManager is Missing Animator Component”, this); }}// Update is called once per framevoid Update(){ if (!animator) { return; } float h = Input.GetAxis(“Horizontal”); float v = Input.GetAxis(“Vertical”); if (v < 0) { v = 0; } animator.SetFloat("Speed", h * h + v * v);}
动画管理员脚本:方向控制编辑脚本PlayerAnimatorManager
#region Private Fields[SerializeField]private float directionDampTime = 0.25f;#endregion
Update里面添加:
animator.SetFloat(“Direction”, h, directionDampTime, Time.deltaTime);
动画管理员脚本:跳跃编辑脚本PlayerAnimatorManager
// deal with JumpingAnimatorStateInfo stateInfo = animator.GetCurrentAnimatorStateInfo(0);// only allow jumping if we are running.if (stateInfo.IsName(“Base Layer.Run”)){ // When using trigger parameter if (Input.GetButtonDown(“Fire2”)) { animator.SetTrigger(“Jump”); }}
结果:
using UnityEngine;using System.Collections;namespace Com.MyCompany.MyGame{ public class PlayerAnimatorManager : MonoBehaviour { #region Private Fields [SerializeField] private float directionDampTime = .25f; private Animator animator; #endregion #region MonoBehaviour CallBacks // Use this for initialization void Start() { animator = GetComponent(); if (!animator) { Debug.LogError(“PlayerAnimatorManager is Missing Animator Component”, this); } } // Update is called once per frame void Update() { if (!animator) { return; } // deal with Jumping AnimatorStateInfo stateInfo = animator.GetCurrentAnimatorStateInfo(0); // only allow jumping if we are running. if (stateInfo.IsName(“Base Layer.Run”)) { // When using trigger parameter if (Input.GetButtonDown(“Fire2”)) { animator.SetTrigger(“Jump”); } } float h = Input.GetAxis(“Horizontal”); float v = Input.GetAxis(“Vertical”); if (v < 0) { v = 0; } animator.SetFloat("Speed", h * h + v * v); animator.SetFloat("Direction", h, directionDampTime, Time.deltaTime); } #endregion }}
摄像机设置添加组件CameraWork到My Kyle Robot预制件
PhotonView组件给模型添加一个PhotonView组件:设置Observe Option到Unreliable On Change
增加武器射线点击模型,打开层级列表,找到头部: 设置两个Cube为射线,然后父对象为Head:
 控制射线:创建一个新的脚本:PlayerManager.cs
using UnityEngine;using UnityEngine.EventSystems;using Photon.Pun;using System.Collections;namespace Com.MyCompany.MyGame{ /// /// Player manager. /// Handles fire Input and Beams. /// public class PlayerManager : MonoBehaviourPunCallbacks { #region Private Fields [Tooltip(“The Beams GameObject to control”)] [SerializeField] private GameObject beams; //True, when the user is firing bool IsFiring; #endregion #region MonoBehaviour CallBacks /// /// MonoBehaviour method called on GameObject by Unity during early initialization phase. /// void Awake() { if (beams == null) { Debug.LogError(“Missing Beams Reference.”, this); } else { beams.SetActive(false); } } /// /// MonoBehaviour method called on GameObject by Unity on every frame. /// void Update() { ProcessInputs(); // trigger Beams active state if (beams != null && IsFiring != beams.activeInHierarchy) { beams.SetActive(IsFiring); } } #endregion #region Custom /// /// Processes the inputs. Maintain a flag representing when the user is pressing Fire. /// void ProcessInputs() { if (Input.GetButtonDown(“Fire1”)) { if (!IsFiring) { IsFiring = true; } } if (Input.GetButtonUp(“Fire1”)) { if (IsFiring) { IsFiring = false; } } } #endregion }}
生命值打开PlayerManager剧本增加一个公众Health属性
[Tooltip(“The current Health of our player”)]public float Health = 1f;
以下两个方法添加到MonoBehaviour Callbacks区域。
/// /// MonoBehaviour method called when the Collider ‘other’ enters the trigger./// Affect Health of the Player if the collider is a beam/// Note: when jumping and firing at the same, you’ll find that the player’s own beam intersects with itself/// One could move the collider further away to prevent this or check if the beam belongs to the player./// void OnTriggerEnter(Collider other){ if (!photonView.IsMine) { return; } // We are only interested in Beamers // we should be using tags but for the sake of distribution, let’s simply check by name. if (!other.name.Contains(“Beam”)) { return; } Health -= 0.1f;}/// /// MonoBehaviour method called once per frame for every Collider ‘other’ that is touching the trigger./// We’re going to affect health while the beams are touching the player/// /// Other.void OnTriggerStay(Collider other){ // we dont’ do anything if we are not the local player. if (! photonView.IsMine) { return; } // We are only interested in Beamers // we should be using tags but for the sake of distribution, let’s simply check by name. if (!other.name.Contains(“Beam”)) { return; } // we slowly affect health when beam is constantly hitting us, so player has to move to prevent death. Health -= 0.1f*Time.deltaTime;}
在公共字段区域中添加此变量
public static GameManager Instance;
Start()方法添加:
void Start(){ Instance = this;}
Update函数添加:
if (Health


